Lithium Ion El - Progress!
Posted: Tue Jul 03, 2007 9:20 pm
So, I'm finally getting things going for the lead to Lithium conversion for my City El.
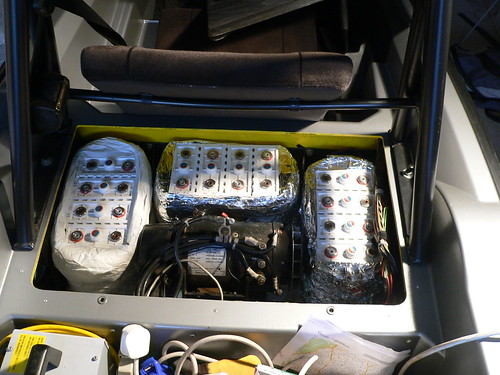
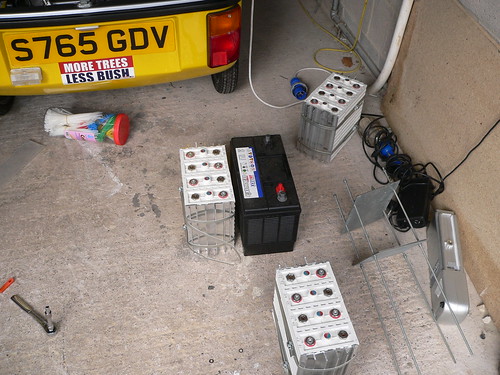
I'm using 100AH Thundersky Lithium Ion cells which I got from Reap Systems. I'm also using Reap System's BMS unit. It will prevent the lithium cells from either going undervoltage or overvoltage. Unlike the Lead acid system the City El uses I have to wire in about thirty or more cables to various parts of the car and batteries to ensure that everything works as it ought.
I've chosen to use 12 cells, giving me a pack voltage around about 42 volts. I know the City El in it' stock format can handle this voltage without anything blowing and it should give me a bit of a performance increase over the original 36 V pack tension.
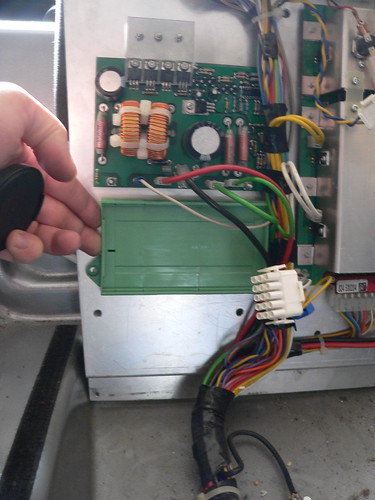
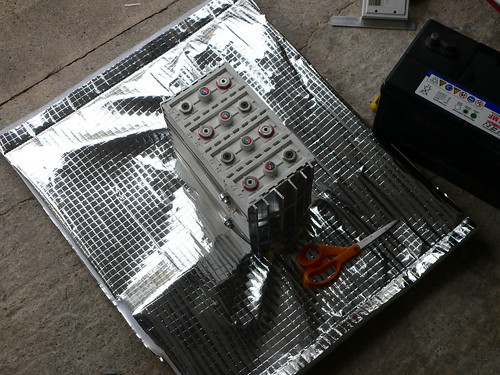
Here's a picture of the BMS:
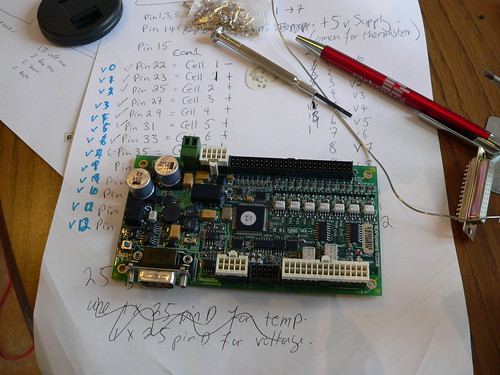
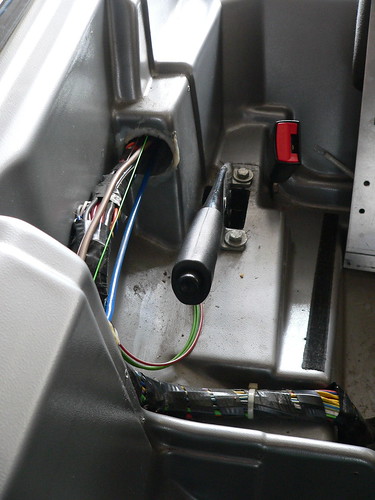
It's a really compact unit and so I've decided to install it under my car's seat, where the original (but missing) capacity meter board would be. It also gives me a perfect cable tunnel between the under-seat and back of car area making sure my cabling is neat and tidy. When I'm done I hope you won't be able to tell it's been upgraded.
Because the BMS uses special plugs and has a special numbering system for the pinout I've decided to label each cable at both ends with a simple numbering pattern. For example, I've used V0 for the Voltage sense, negitave side, V1 for voltage sensor, Cell 1, etc etc.
It seems to be working at the moment and will enable me to solder another connector in place when I've got the cable installed in the car.
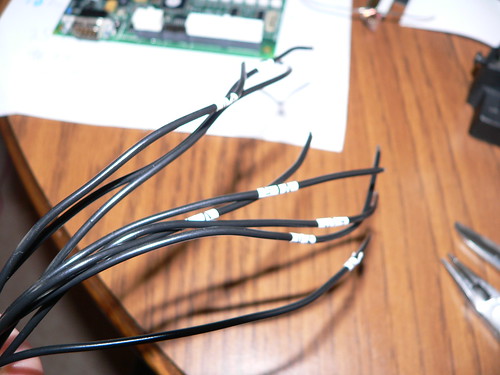
Tonight I've finished the voltage cable sensors (13 wires in total) and I've heat shrinked the entire lot together after checking the continuity of each wire. Hopefully with all the cables heat-shrinked together they will be a little more robust in the harsh environment of a car.
So, keep up to date for more progress. I'm really hoping to get the car ready for Sunday's Microcar rally near Bristol!
I'm using 100AH Thundersky Lithium Ion cells which I got from Reap Systems. I'm also using Reap System's BMS unit. It will prevent the lithium cells from either going undervoltage or overvoltage. Unlike the Lead acid system the City El uses I have to wire in about thirty or more cables to various parts of the car and batteries to ensure that everything works as it ought.
I've chosen to use 12 cells, giving me a pack voltage around about 42 volts. I know the City El in it' stock format can handle this voltage without anything blowing and it should give me a bit of a performance increase over the original 36 V pack tension.
Here's a picture of the BMS:
It's a really compact unit and so I've decided to install it under my car's seat, where the original (but missing) capacity meter board would be. It also gives me a perfect cable tunnel between the under-seat and back of car area making sure my cabling is neat and tidy. When I'm done I hope you won't be able to tell it's been upgraded.
Because the BMS uses special plugs and has a special numbering system for the pinout I've decided to label each cable at both ends with a simple numbering pattern. For example, I've used V0 for the Voltage sense, negitave side, V1 for voltage sensor, Cell 1, etc etc.
It seems to be working at the moment and will enable me to solder another connector in place when I've got the cable installed in the car.
Tonight I've finished the voltage cable sensors (13 wires in total) and I've heat shrinked the entire lot together after checking the continuity of each wire. Hopefully with all the cables heat-shrinked together they will be a little more robust in the harsh environment of a car.
So, keep up to date for more progress. I'm really hoping to get the car ready for Sunday's Microcar rally near Bristol!

 [/url]